
Modern apps rely on dynamic content — user profiles, messages, products, posts — almost everything on screen is fed from a backend or generated at runtime. If your UI doesn’t support dynamic lists well, your app won’t scale.
That’s why OMIA Studio includes a powerful feature called the Adapter — a visual container specifically designed to handle dynamic data.
In this article, I’ll walk you through how to dynamically populate lists in OMIA Studio using its built-in Adapter widget and a little help from the Ginni framework.
What’s an Adapter?
Think of an Adapter as a flexible list container. You design one item layout, and OMIA automatically repeats it for every item in your data source — similar to how a RecyclerView works in native Android or a map() function in JavaScript frameworks.
On the canvas, an Adapter looks like an empty box — but behind the scenes, it’s a data-powered list that renders at runtime.
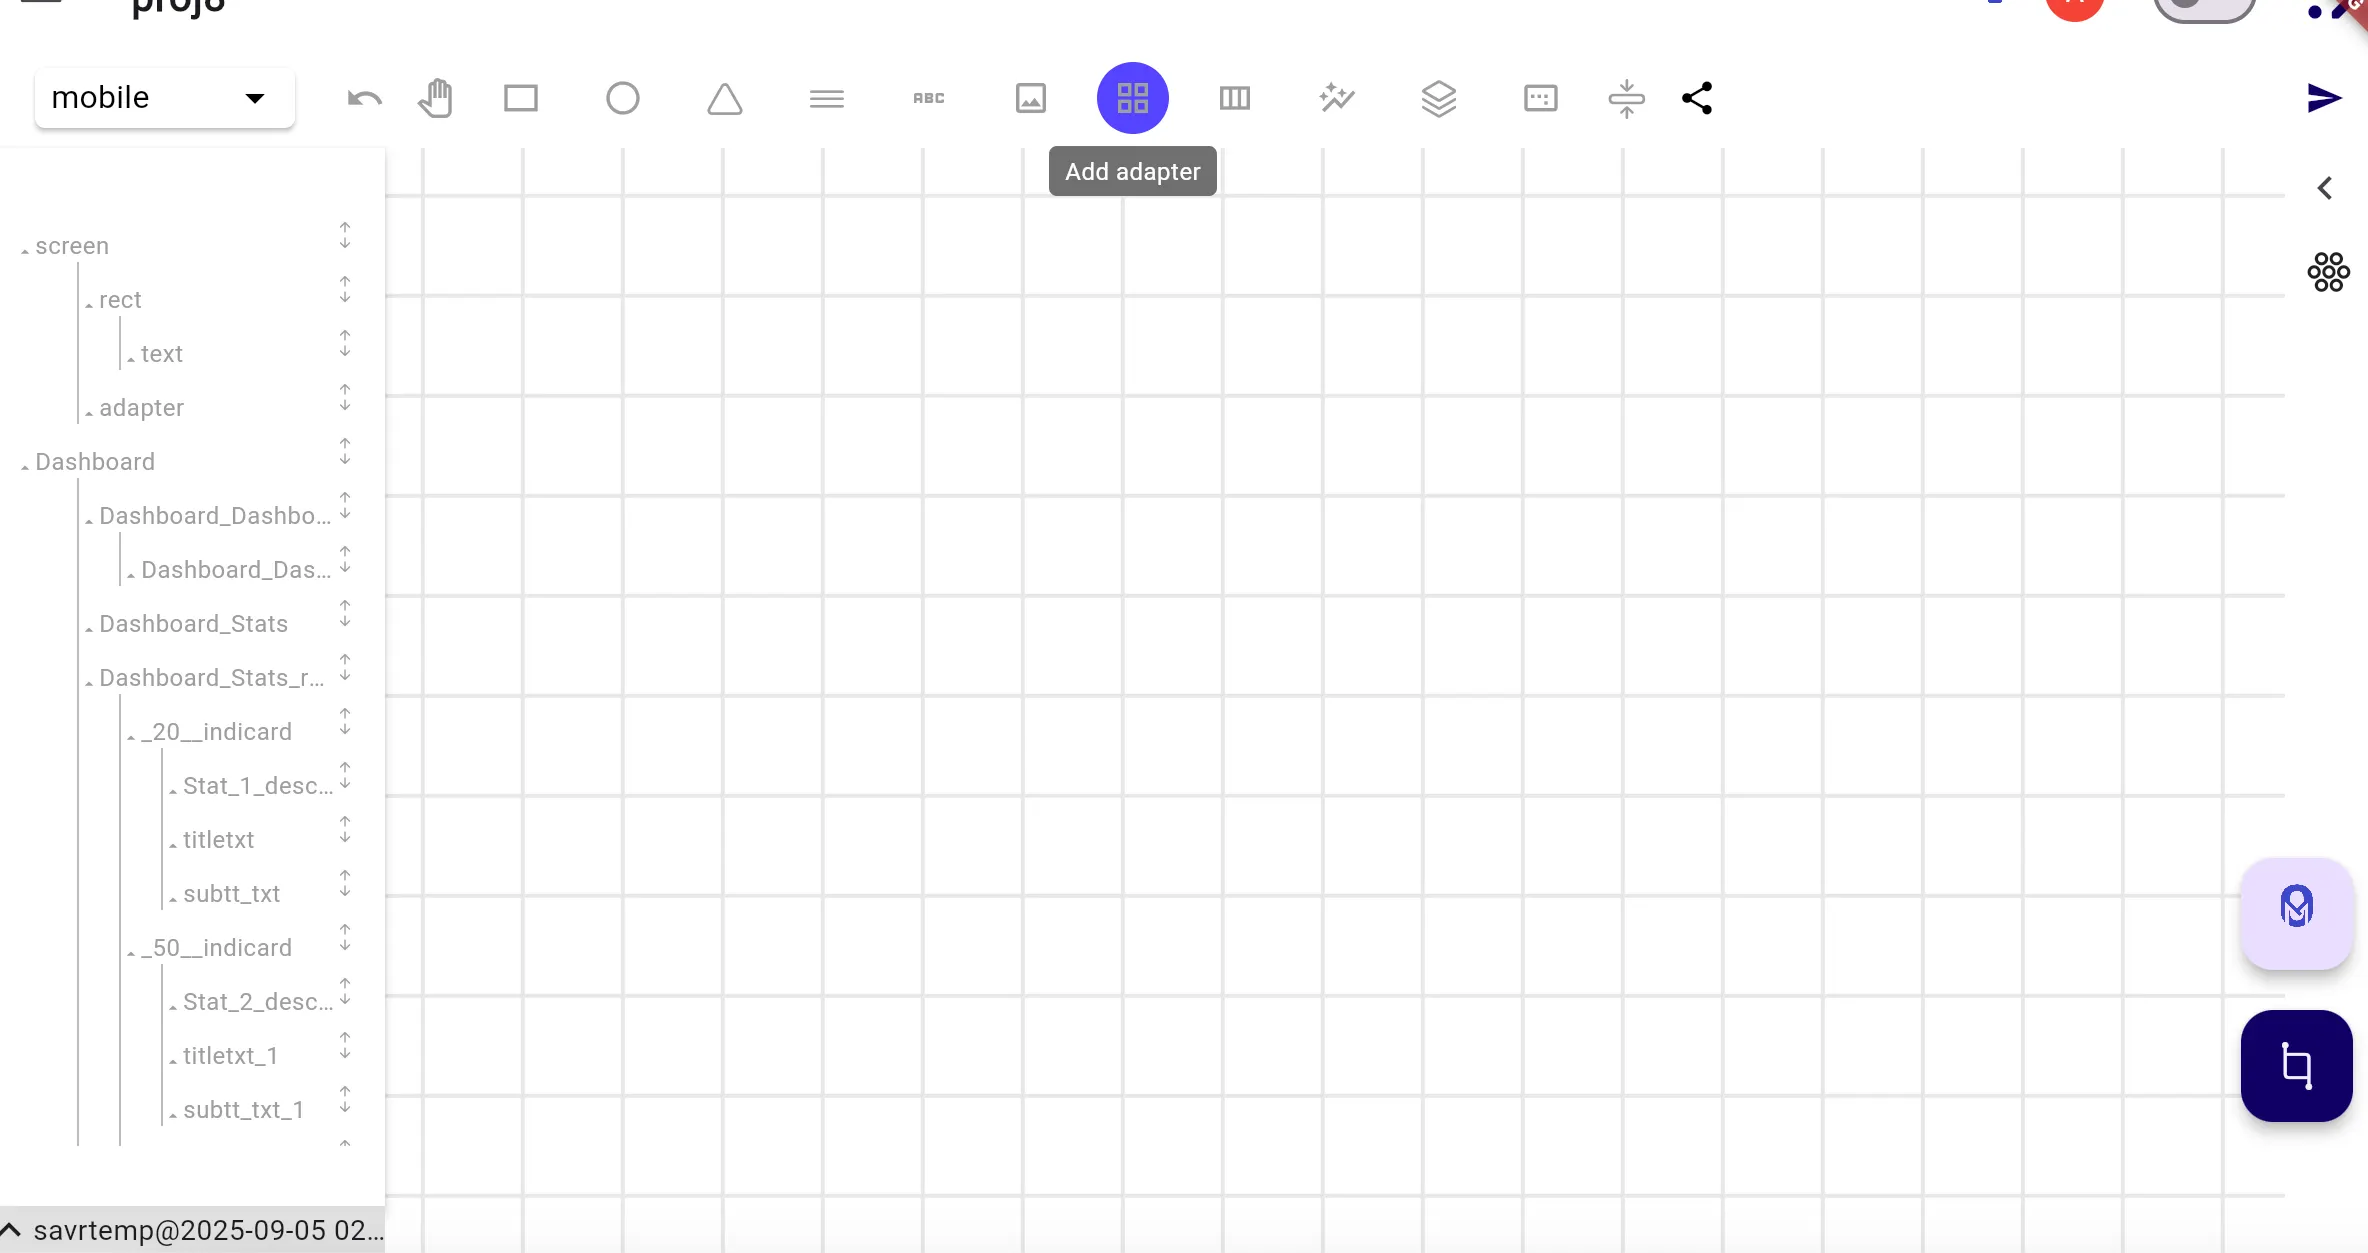
Step 1: Add an Adapter to Your Screen
- Open your screen in OMIA Studio’s drag-and-drop editor.
- From the component panel, drag in an Adapter widget.
- Resize and anchor it based on where you want your list to live.
By default, the Adapter will appear as a blank container — but don’t worry, the content comes later.
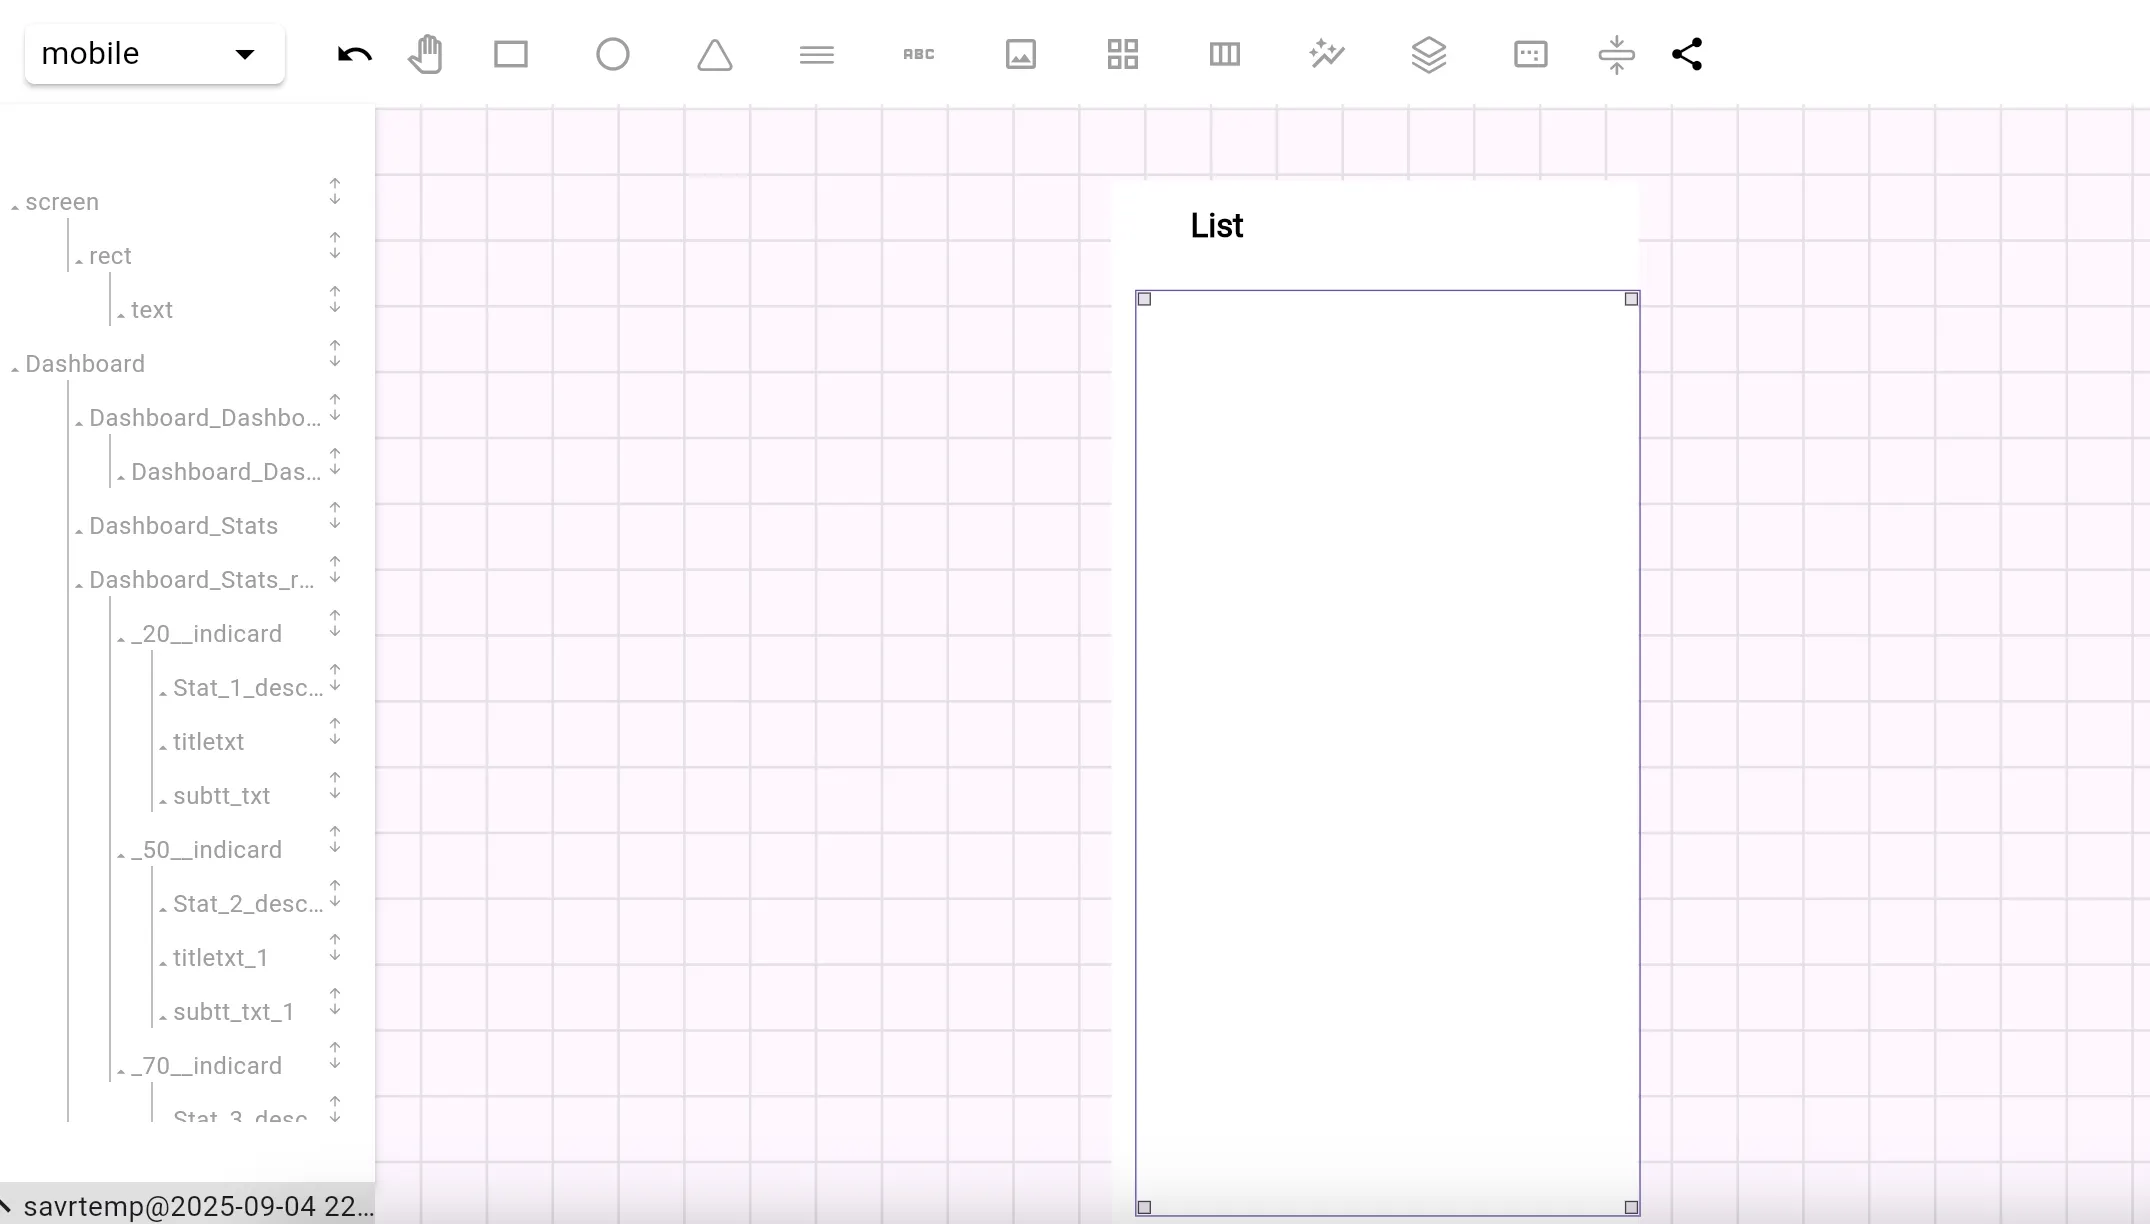
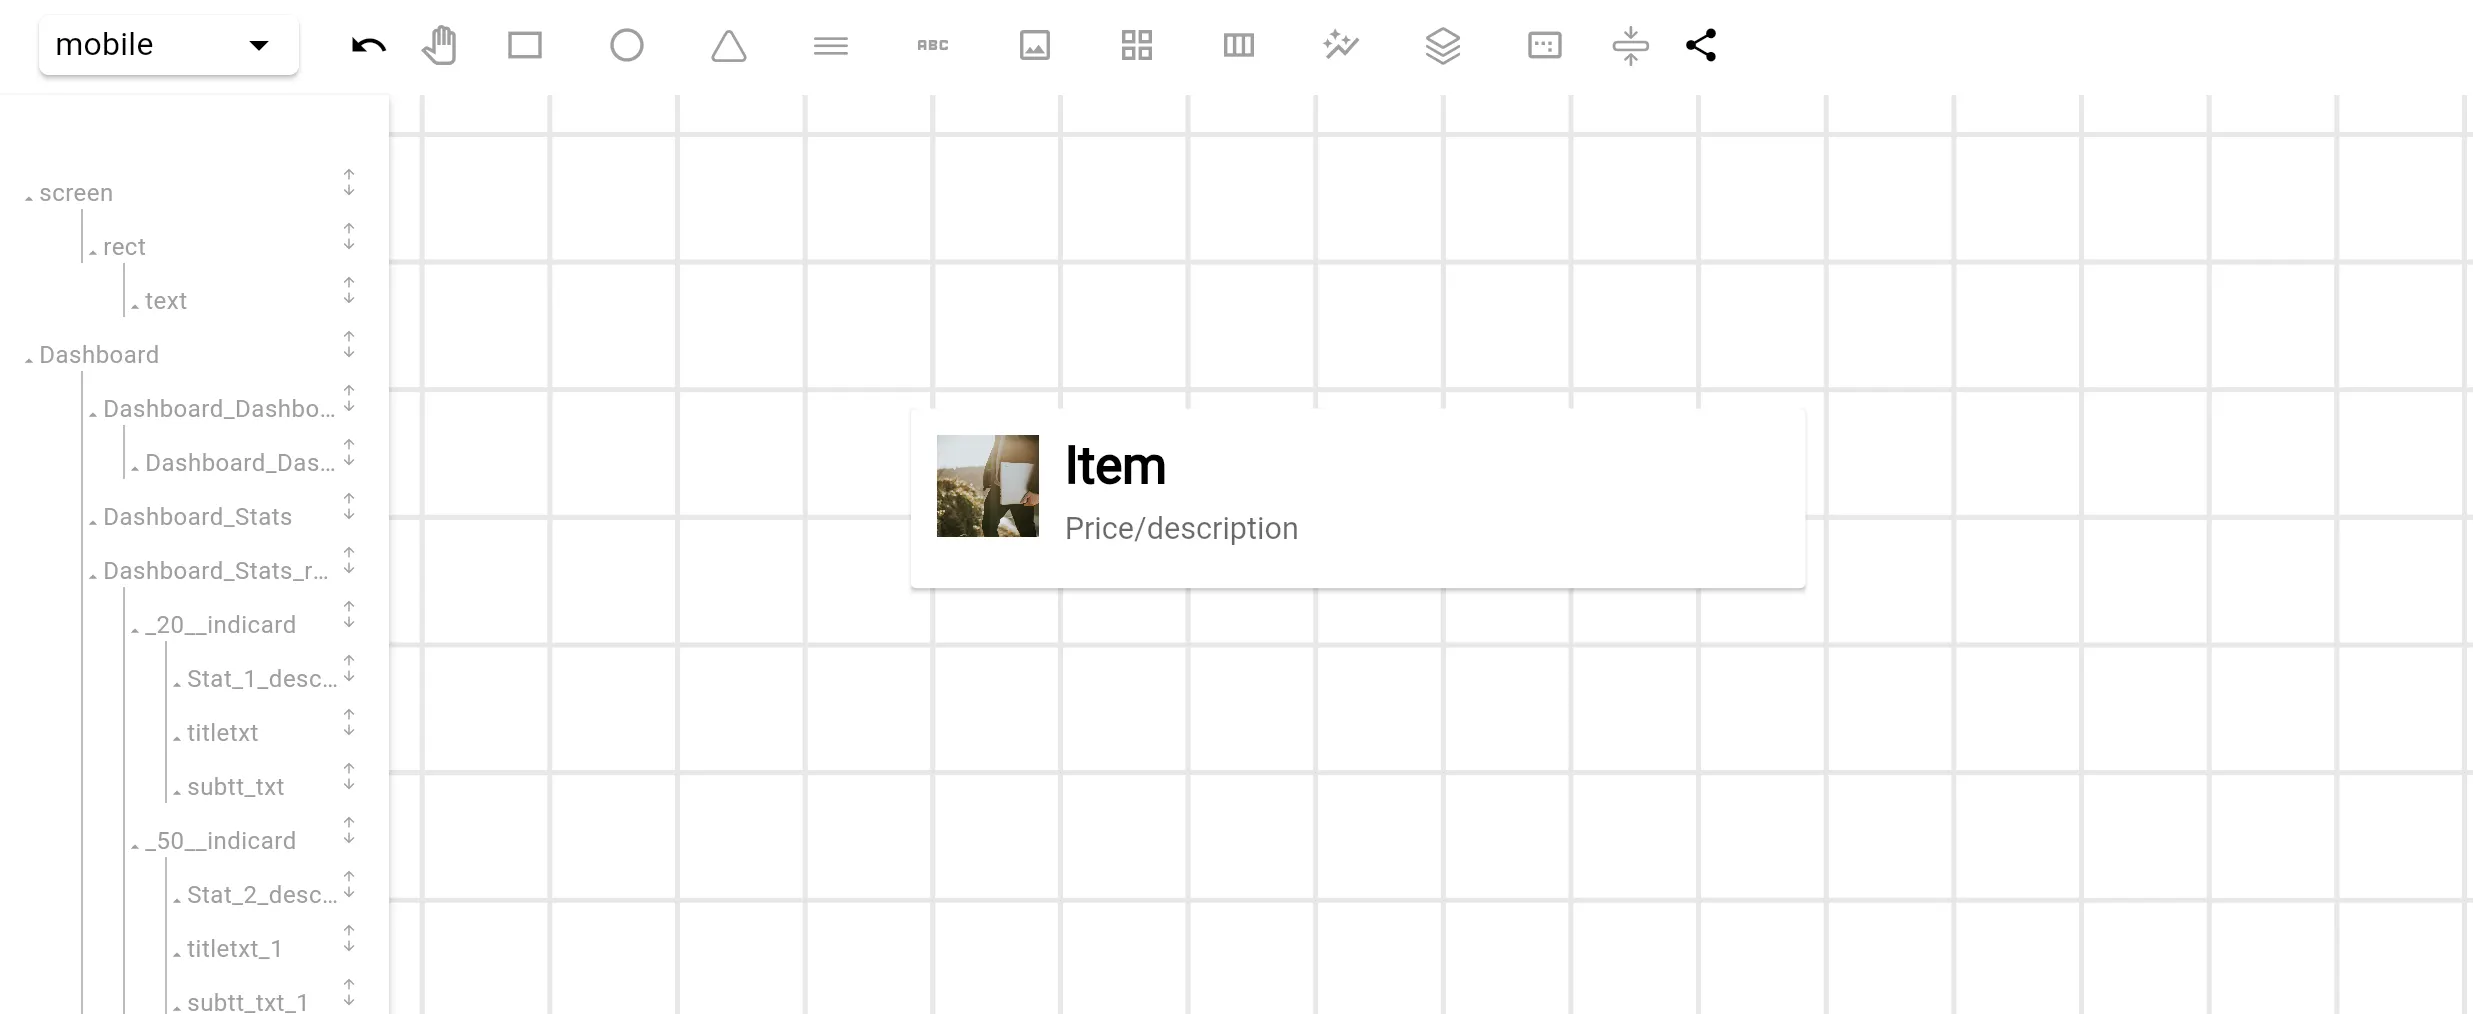
Step 2: Design the List Item Template
Now, create a visual template for a single list item — for example, a card with a profile picture and username, or a product tile with image and price.
- Add the necessary widgets (Image, Text, etc.) inside the Adapter container.
- Style them however you want — this layout will repeat for each item at runtime.
Important:
Only one child view should exist inside the Adapter. This child serves as the “template” for all dynamically added items.
Step 3: Choose List Behavior
OMIA lets you control how items appear inside the Adapter.
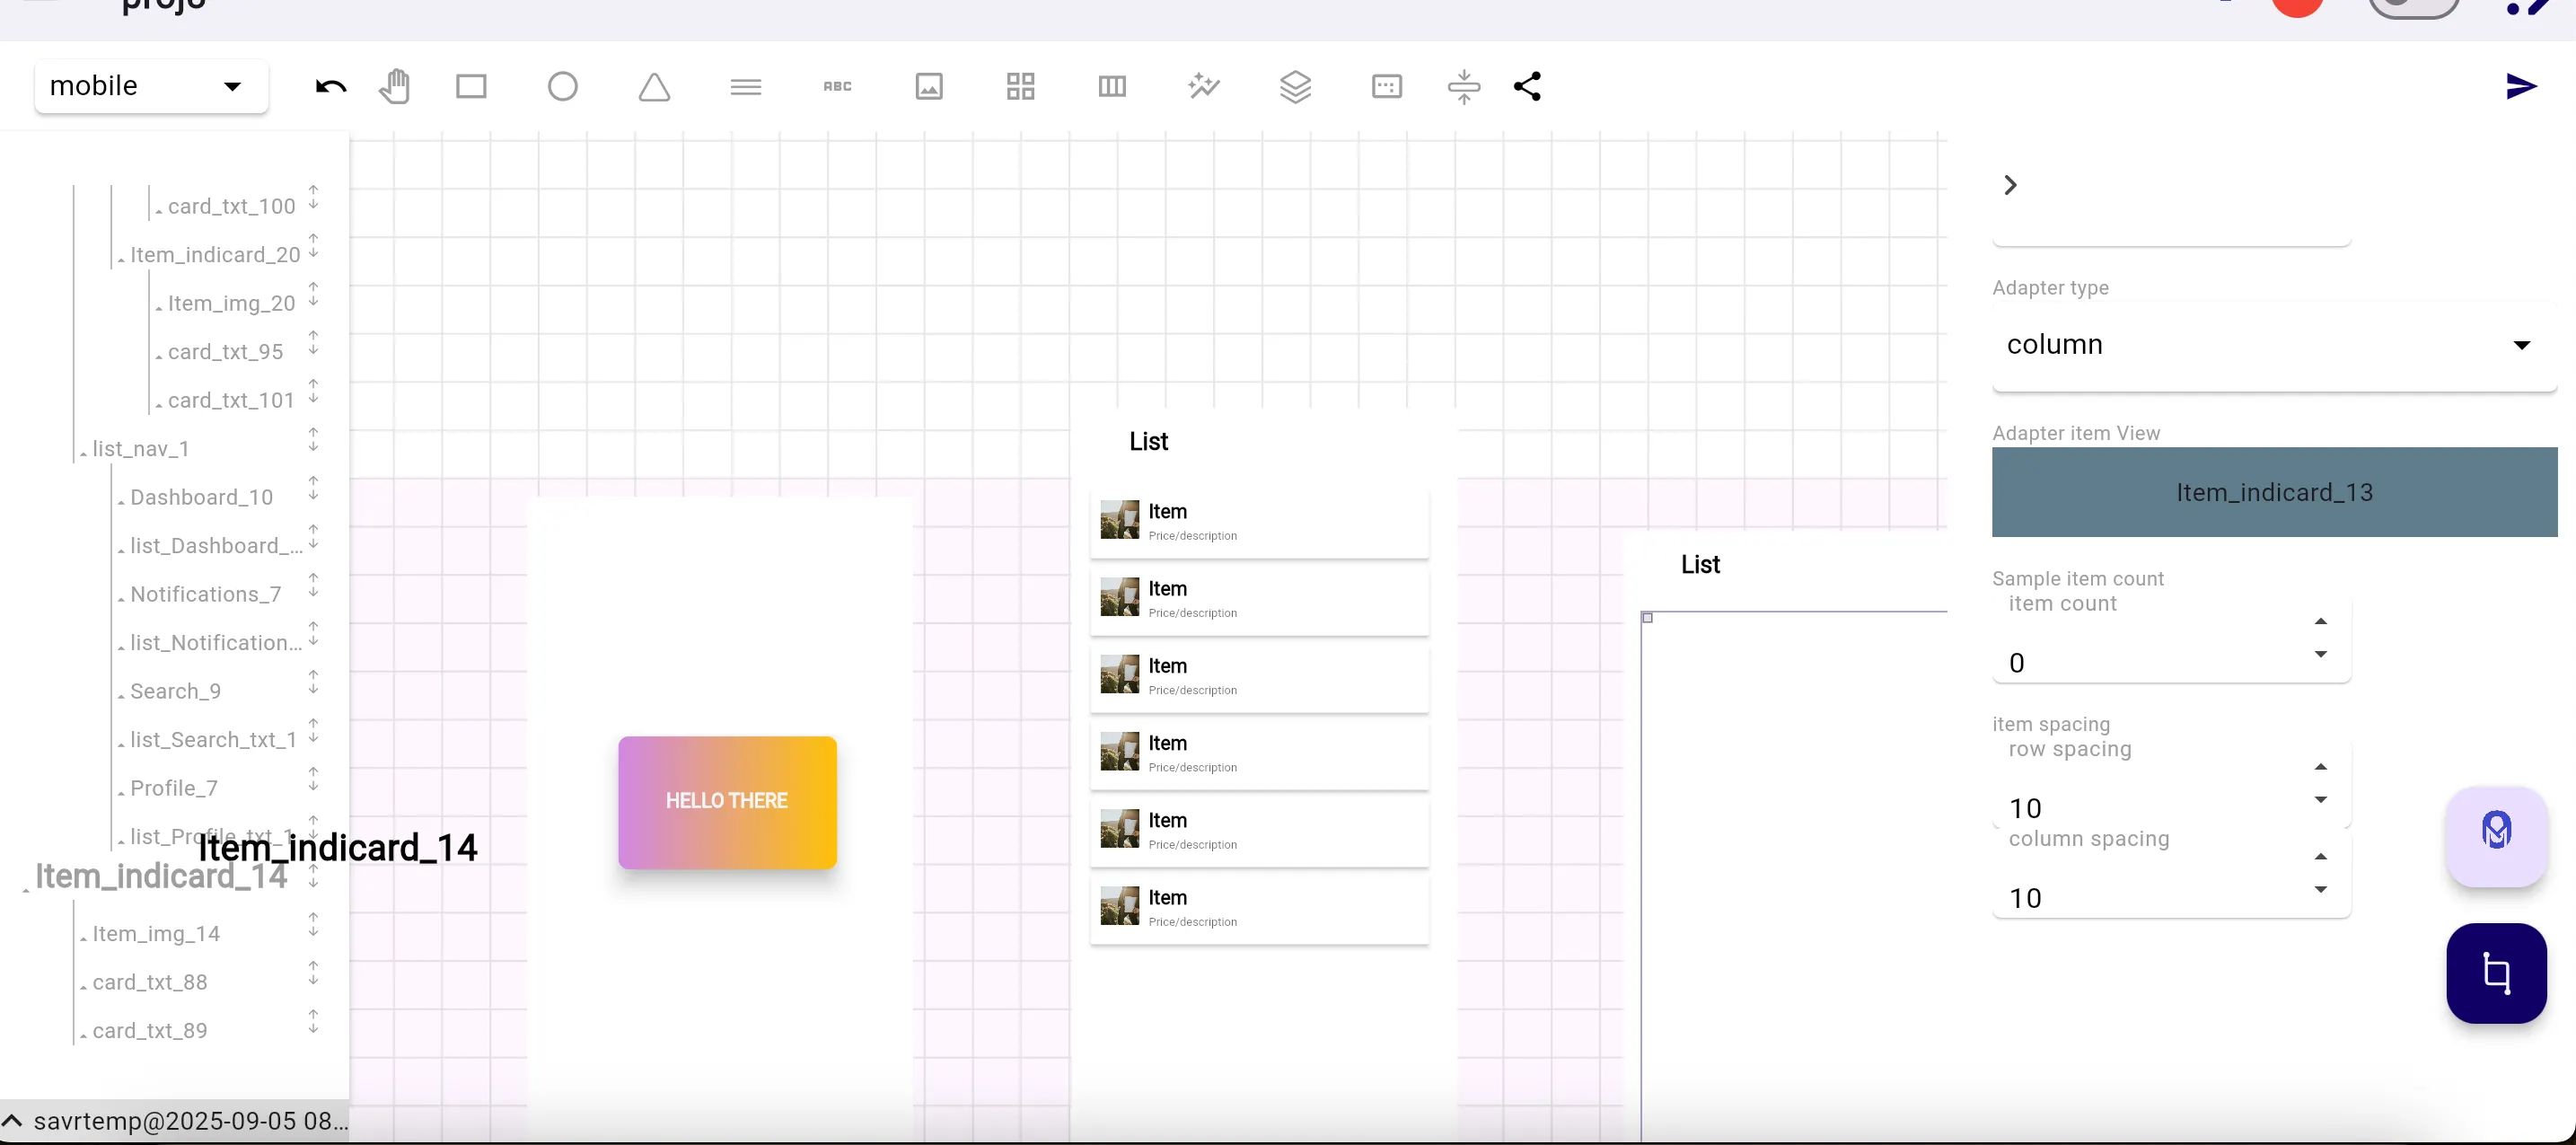
- Adapter type: Choose vertical or horizontal layout
- Child Count: Specify how many preview items you want visible during design.
These settings help with layout planning, but remember — in production, real data populates this list.
Step 4: Populate the Adapter with Code
Now comes the fun part — using OMIA’s event-driven Ginni framework to inject data into the Adapter at runtime.
Let’s say you have a list of user objects:
users = [
   {"name": "Ada", "image": "http://localhost/ada.jpg"},
   {"name": "Turing", "image": "https://localhost/turing.jpg"},
   {"name": "Hopper", "image": "https://localhost/hopper.jpg"}
   ]
You can use Ginni to:
- Loop through the data
- Clone the item template
- Populate each child with data
- Add each child to the Adapter
Example in Python
template_id = 'TEMPLATE_ID'
   adapter_id = 'ADAPTER_LIST_ID'

   async def populate_list():
   for user in users:
   item = await g.create_widget_type(template_id=template_id, parent_id=adapter_id)
   item.get_child('TEMPLATE_TITLE_TEXT_ID').set_text_context(user["name"])
   item.get_child('TEMPLATE_PROFILE_PIC_ID').set_text_context(user["name"])
   item.set_img_src("profile_pic", user["image"])

   await populate_list()
This runs at runtime — so the Adapter will render a list of users dynamically, based on the dataset.
Step 5: Test Your Dynamic List
Click Preview in OMIA Studio to run your screen. You should now see a scrollable list populated from your data — and it’s completely interactive.
You can now:
- Add click events to each list item
- Update items in real time
- Bind API data instead of static lists
Bonus: Connect to an API
Want to pull your data from a live server? You can use Ginni’s HTTP support to fetch data on load and pass it to your Adapter.
template_id = 'TEMPLATE_ID'
   adapter_id = 'ADAPTER_LIST_ID'

   async def populate_list():
   response = await g.make_request("https://example.com/users")
   for user in users:
   item = await g.create_widget_type(template_id=template_id, parent_id=adapter_id)
   item.get_child('TEMPLATE_TITLE_TEXT_ID').set_text_context(user["name"])
   item.get_child('TEMPLATE_PROFILE_PIC_ID').set_text_context(user["name"])
   item.set_img_src("profile_pic", user["image"])

   await populate_list()
Replace the earlier static list with the actual API response, and your list becomes fully dynamic and production-ready.
Conclusion
OMIA Studio doesn’t just let you design visually — it gives you the tools to bring your UIs to life with real, dynamic content. The Adapter widget, paired with the Ginni framework and Python support, makes list population clean and flexible.
No HTML. No external codebase. Just open OMIA, design your list, write a few lines of code, and you’re done.
Merry builds!